Web Proxy
FortiPoC provides an HTTP/HTTPS web proxy to get access to PoC’s devices with a private PoC address (the one specified as FortiPoC Native Functions address). It allows access to FAC web administration interface as the port redirection mechanism breaks the FAC security access policy.
To use the FortiPoC proxy, you must configure your Web Browser, Google Chrome and Firefox have add-ons that ease the process.
FortiPoC generates a .pac file for the running PoC to only proxify access to the PoC’s devices and not your global Web traffic.
Google Chrome
SwitchyOmega
It’s a plugin available on [chrome web store](https://chrome.google.com/webstore/).
Configuring
How to use FortiPoC PAC file with SwitchyOmega extension.
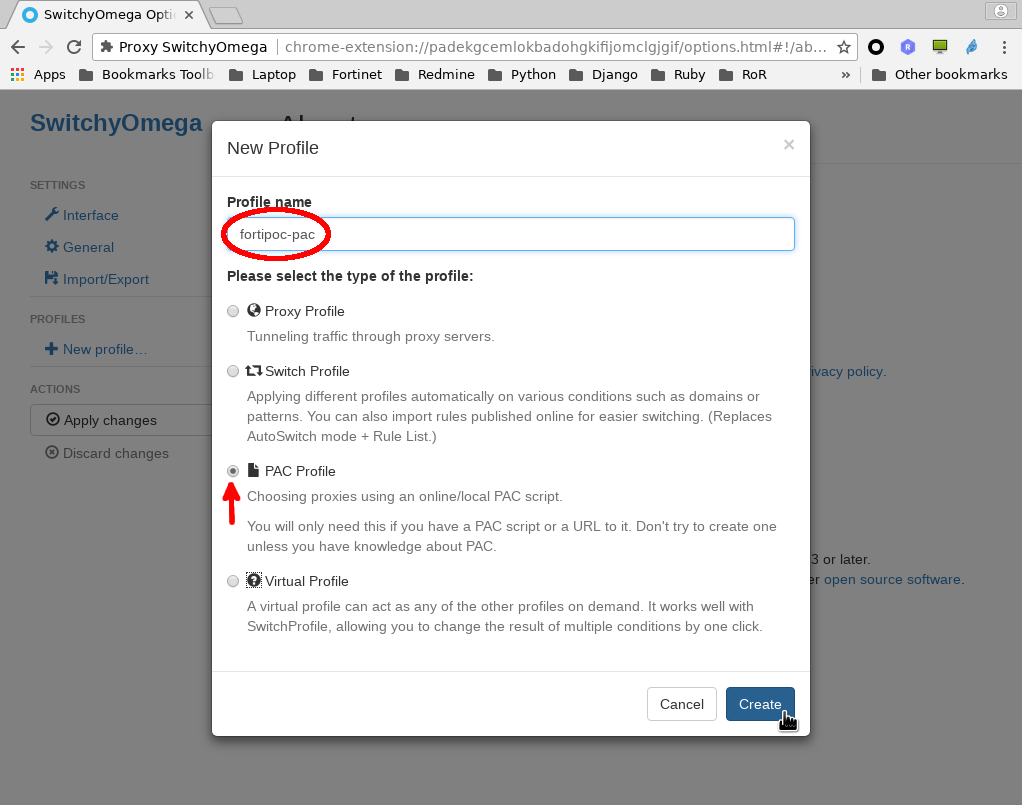
Open the SwitchyOmega options and click on “New profile…”:
Enter “fortipoc-pac” as the “Profile name” and select “PAC Profile” mode, then click <button class=”btn btn-primary”>Create</button> button.
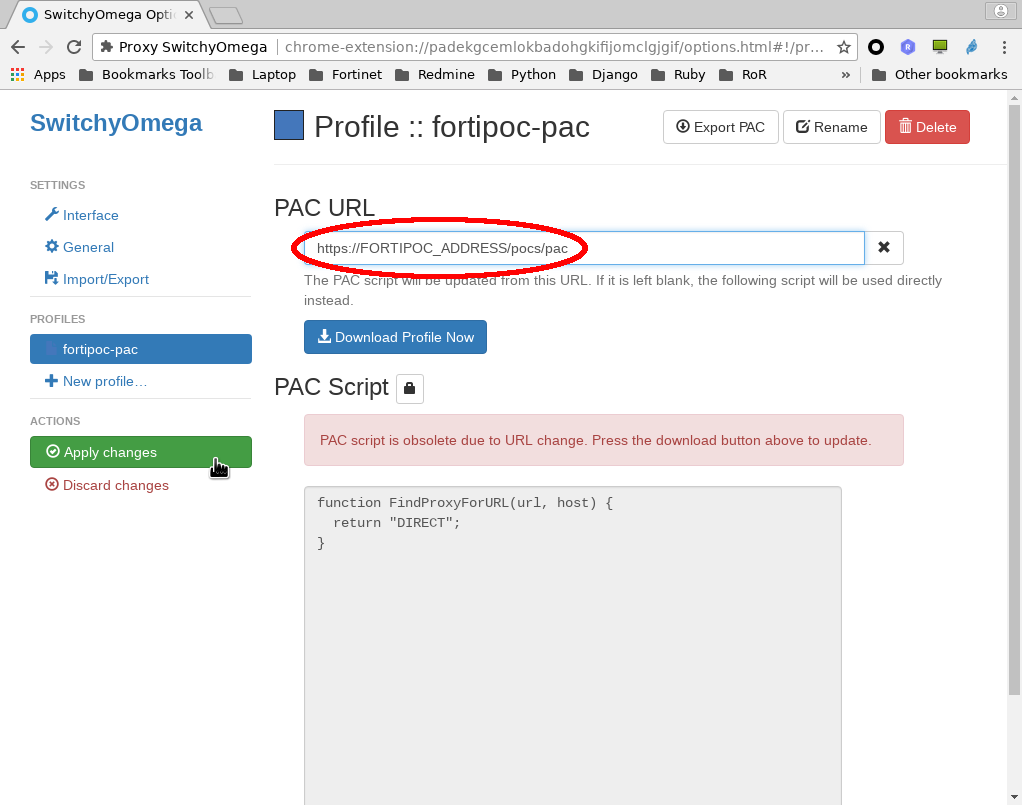
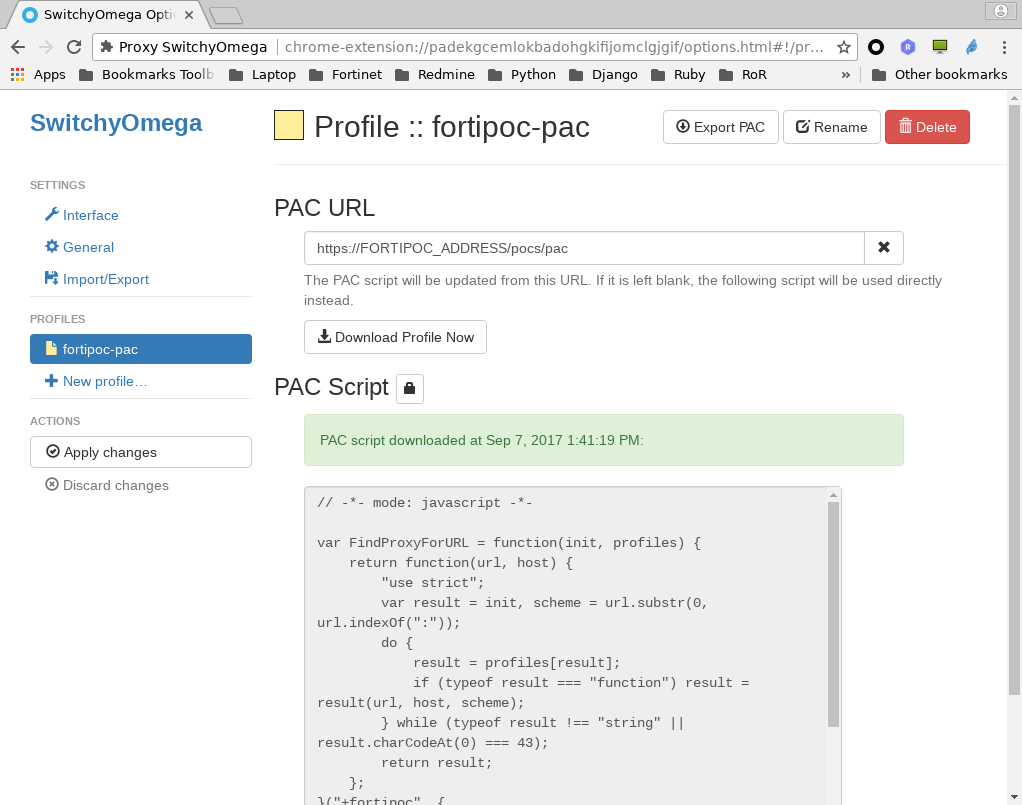
Enter the “PAC URL” address as “https://FORTIPOC_ADDRESS/pocs/pac”, this address always returns the PAC of the current running PoC. Then click on the <button class=”btn btn-success”><span class=”glyphicon glyphicon-ok-circle”></span> Apply changes</button> button.
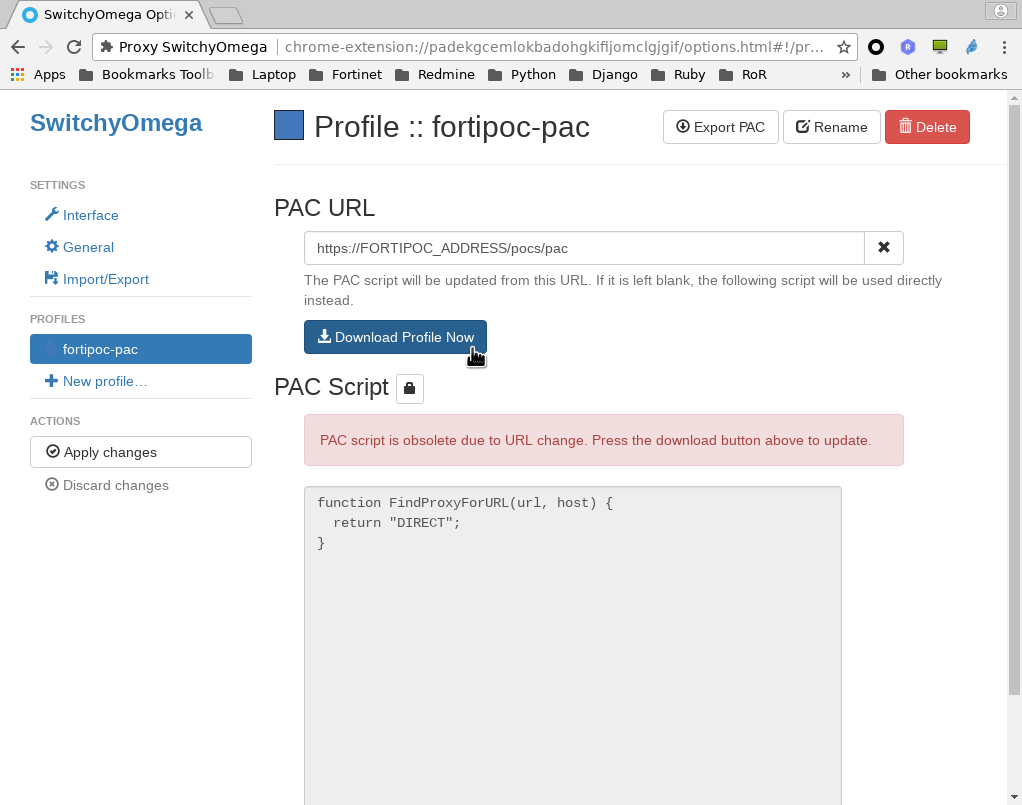
You can now click on <button class=”btn btn-primary”><span class=”glyphicon glyphicon-download-alt”></span> Download Profile Now</button> to download the profile.
The download should be successful:
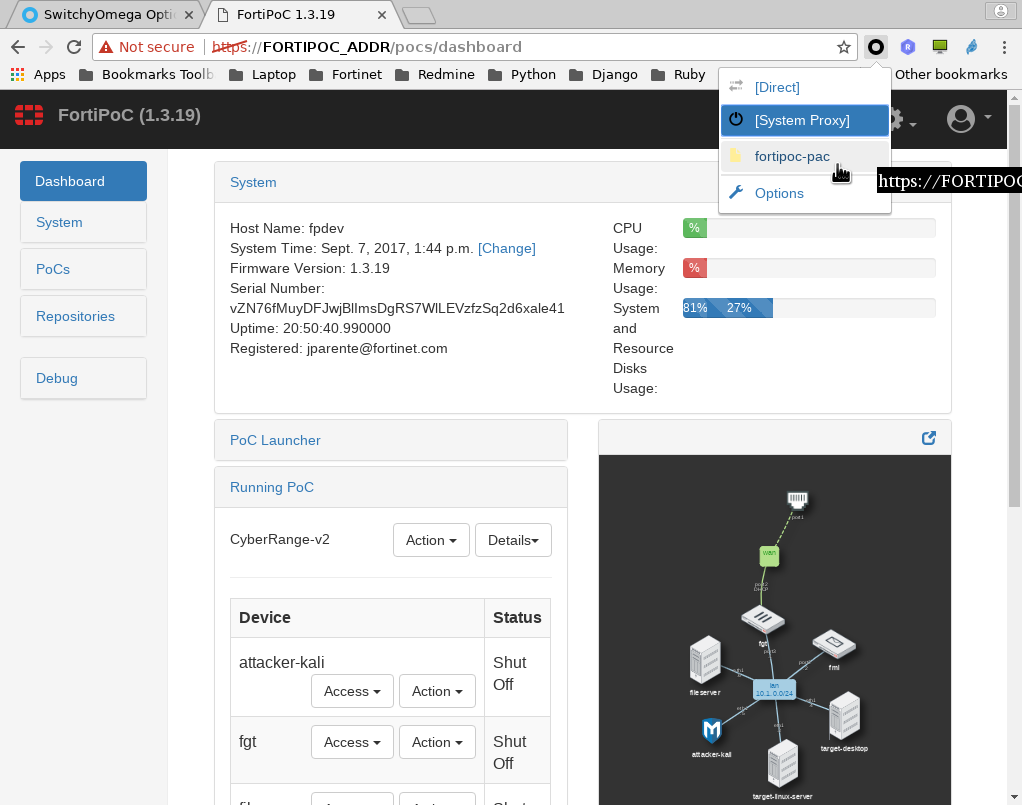
Now you can enable the “fortipoc-pac” proxy settings from the button bar SwitchyOmega button.
Refreshing
To force the refresh; open the SwitchyOmega options and select “fortipoc-pac” profile then click the <button class=”btn btn-primary”><span class=”glyphicon glyphicon-download-alt”></span> Download Profile Now</button> again.
Firefox
Recent Firefox prevents to use PAC file.
FoxyProxy Basic
It’s an add-on available on [Mozilla add-ons portal](https://addons.mozilla.org/en-US/addon/foxyproxy-basic).
Configuring
How to use FortiPoC PAC file with FoxyProxy Basic extension. Same procedure should work with FoxyProxy Standard.
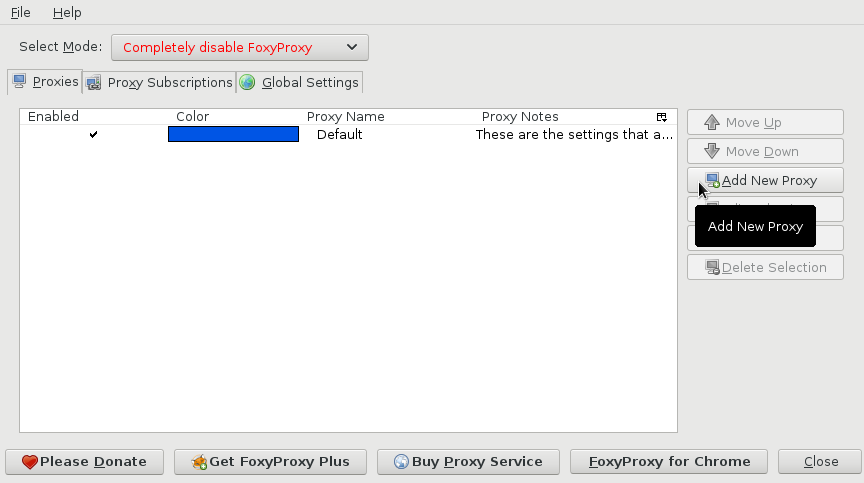
Open the FoxyProxy preferences and click on “Add New Proxy”:
Select the “Automatic Proxy Configuration” and “by PAC”. Enter the “PAC URL” address as “https://FORTIPOC_ADDRESS/pocs/pac”, this address always returns the PAC of the current running PoC.
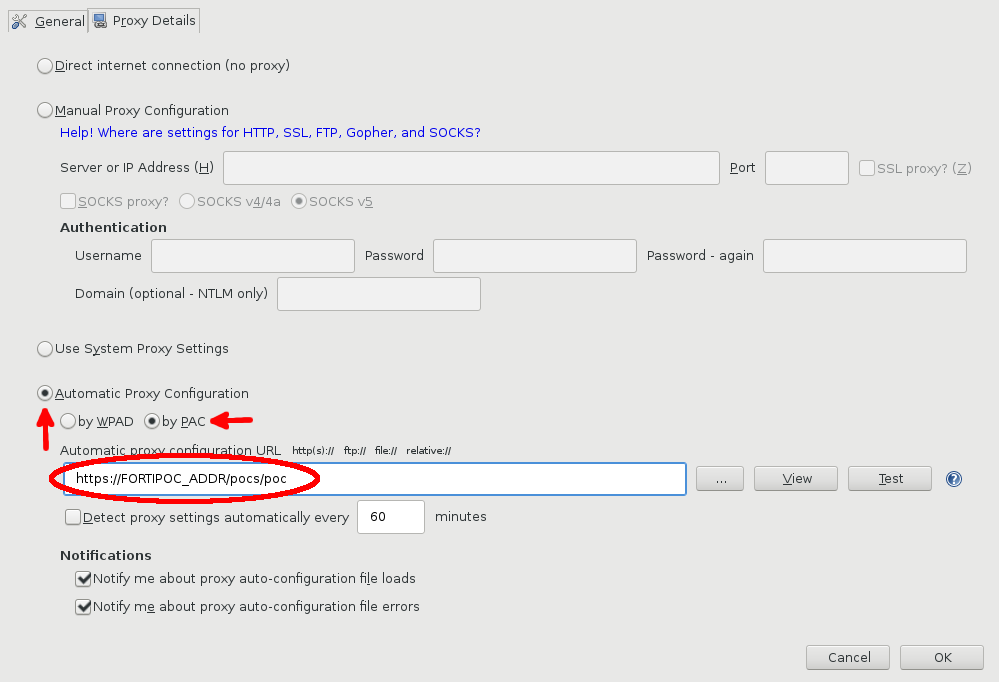
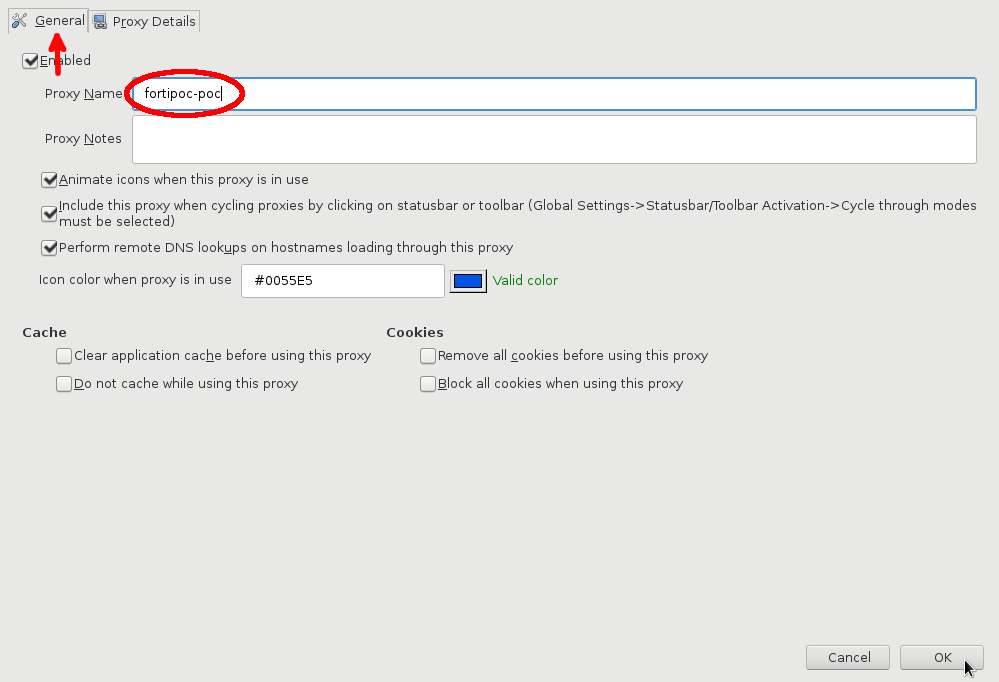
Open the “General” tab and enter “fortipoc-pac” as “Proxy Name”. Then click on the “OK” button.
Now you can enable the “fortipoc-pac” proxy settings right clicking the FoxyProxy button on button bar.
Refreshing
There is no clear options to force FoxyProxy to refresh the settings.
You can enable the “Detect proxy settings automatically …” on the “Proxy Details” and change the frequency to 1 minute.
Clicking on “View” or “Test” buttons seems to trigger a refresh.