How To Install Windows in FortiPoC
You can download Windows (or Entreprise edition) ISO disks from Microsoft.
Warning
It’s your responsibility to conform to Microsoft license and policies.
Copying ISO images
in CLI, enable local repository:
fortipoc # repo local enable
copy your Windows installation ISO disk, it must be prefixed by
windows-:$ scp Win10_2004_EnglishInternational_x64.iso admin@FORTIPOC_IP:images/windows-Win10_2004_EnglishInternational_x64.iso
in CLI, generate repository meta information:
fortipoc # repo local build
- "images/windows-Win10_2004_EnglishInternational_x64.iso": Update
Complete
FortiPoC defines Windows VM with VirtIO’s disk and network interfaces because IDE disk and e1000 interface emulations show poorer performance. But Windows doesn’t support VirtIO devices by default. Download the drivers’ ISO CDRom image “Stable virtio-win iso: from Fedora
copy the drivers’ ISO CDRom image to the local repository:
$ scp virtio-win.iso admin@FORTIPOC_IP:
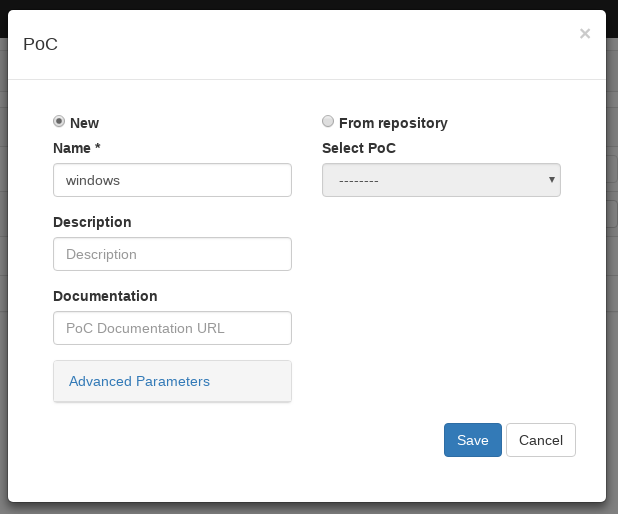
Creating a basic PoC
define a new PoC to install the Windows:
create the new PoC:
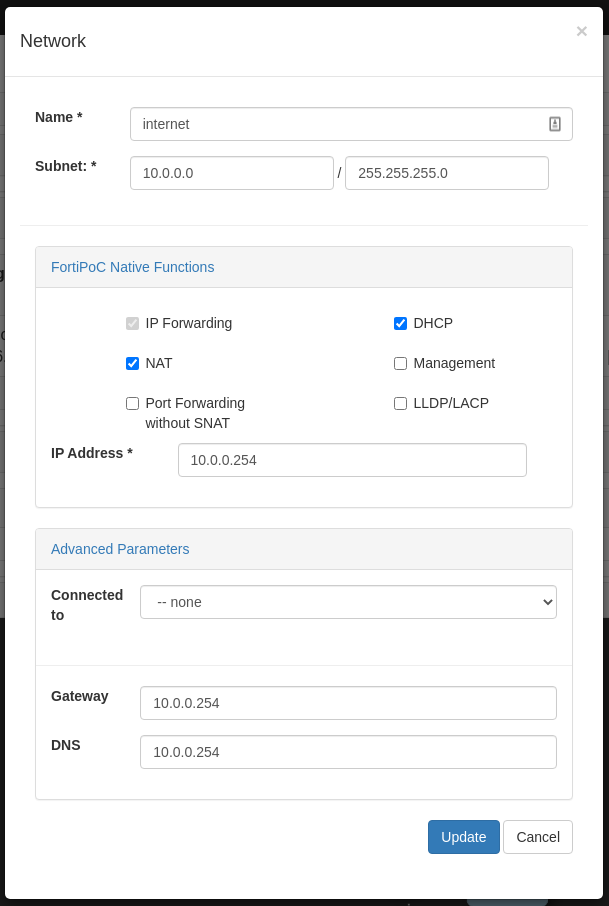
define the Network, enable DHCP, NAT and IP Forwarding Native Functions, don’t forget to specify the Gateway and DNS if you want to access internet resources:
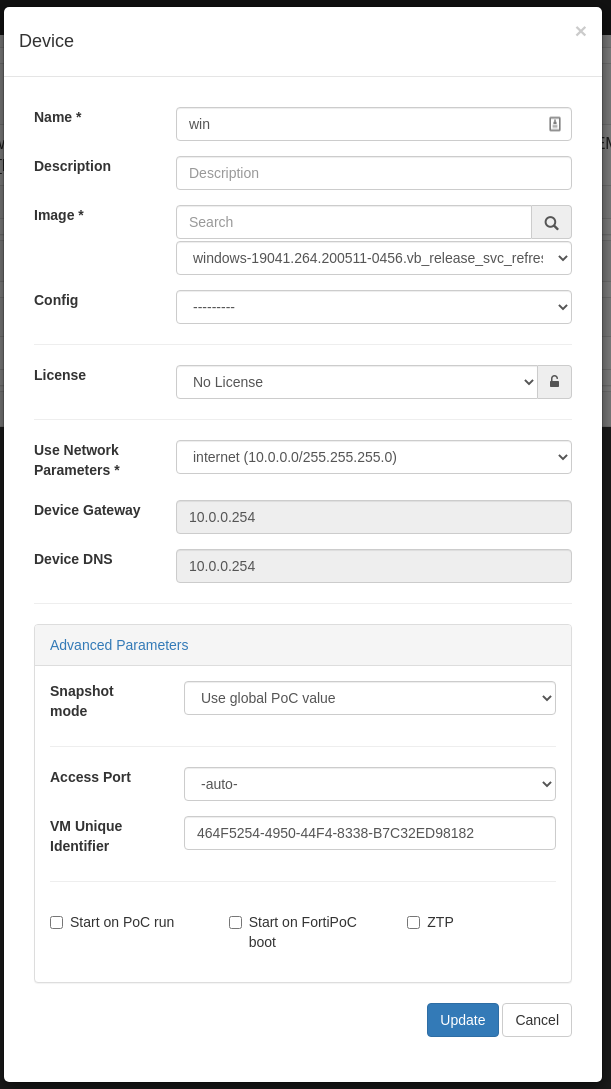
define the Windows Device, use internet for Network Parameters and disable Start on PoC run option:
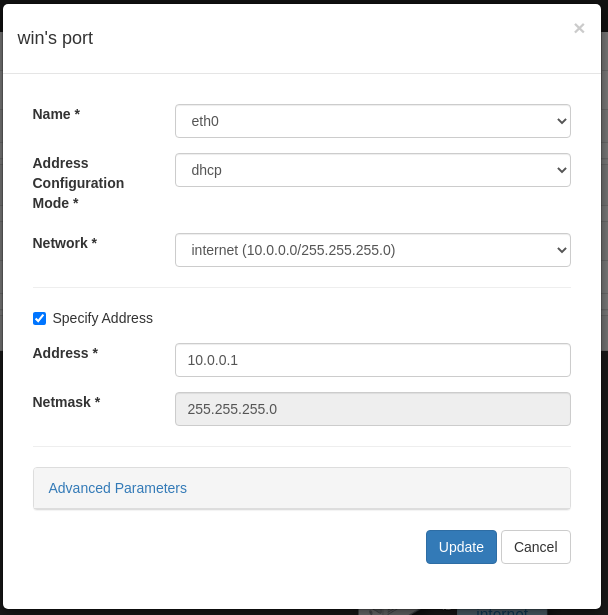
define one DHCP port:
customize VM definition and disk size. By default the created disk size is 20GB, and VM uses 1 CPU and 1 GB of memory. You can change these parameters in your Windows VM’s Advanced Parameters:

then edit relevant parameters, ex:
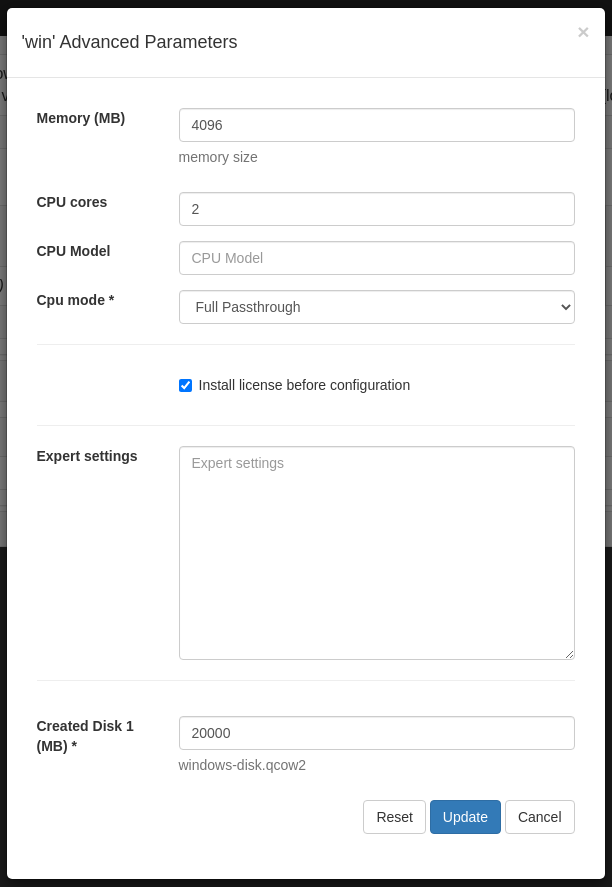
_
Warning
It’s more difficult to increase disk size afterward.
launch your PoC from the dashboard. The Windows VM is created but not started as we need to attach drivers’ ISO CDRom image before starting it
in CLI, attach the ISO CDRom image:
fortipoc # expert device cdrom add 1 virtio-win.iso
1is the Windows device index, you can see the list of devices withpoc device listcommandpower on the Windows device from device’s Action menu
Installing Windows with VirtIO drivers
from the dashboard, open the Windows device’s display from the device’s Access menu
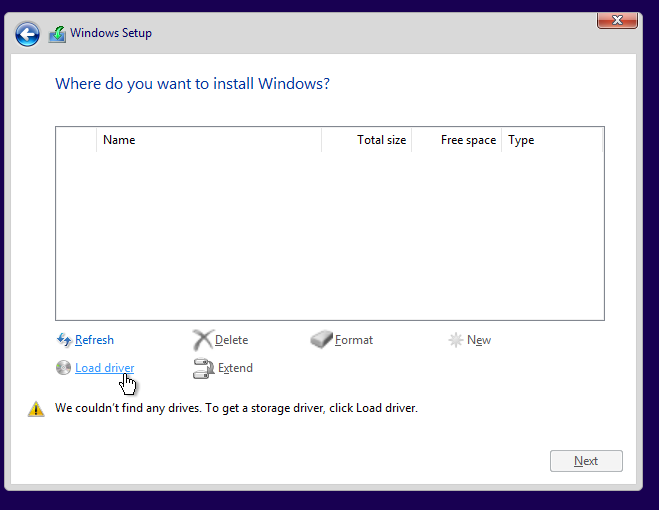
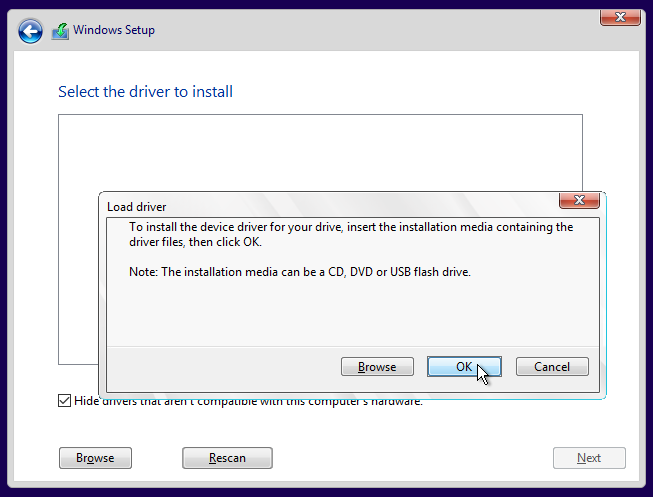
when it’s time to choose the hard disk for installation, you should not see any, but you should be able to Load Driver:
Since the driver ISO CDRom image is already mounted, you only need to click on “OK”:
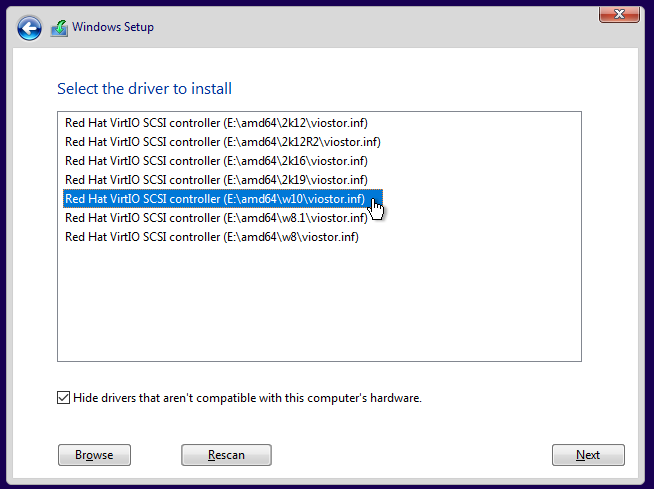
select the Red Hat VirtIO SCSI controller driver matching your Windows version:
once the drivers’ installation is complete, you should now see the hard disk, you can then install Windows on it
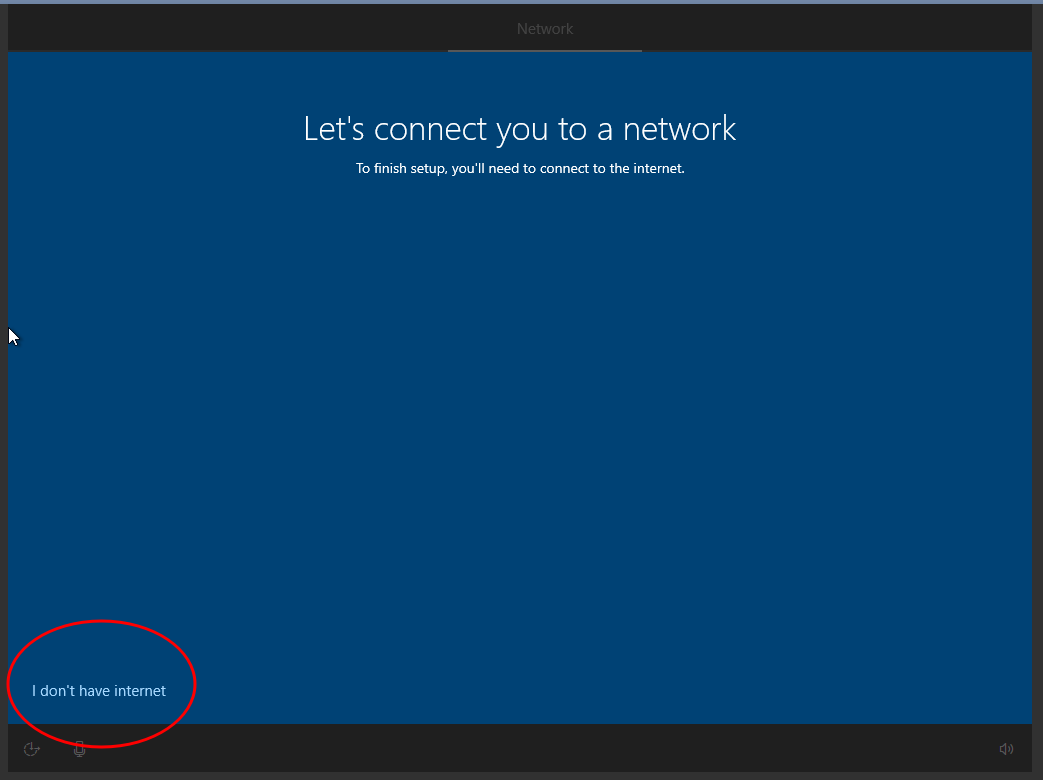
after multiple reboot, you should be able to complete the windows installation. When Windows requires a network connection, skip it:
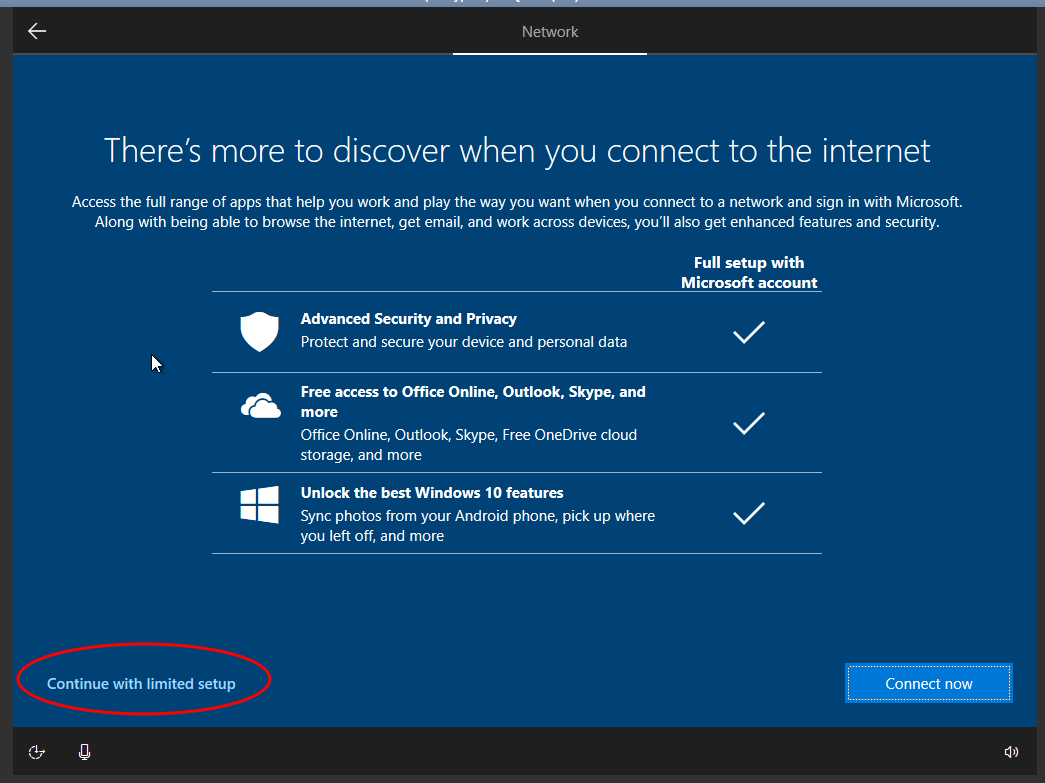
And continue with limited setup:
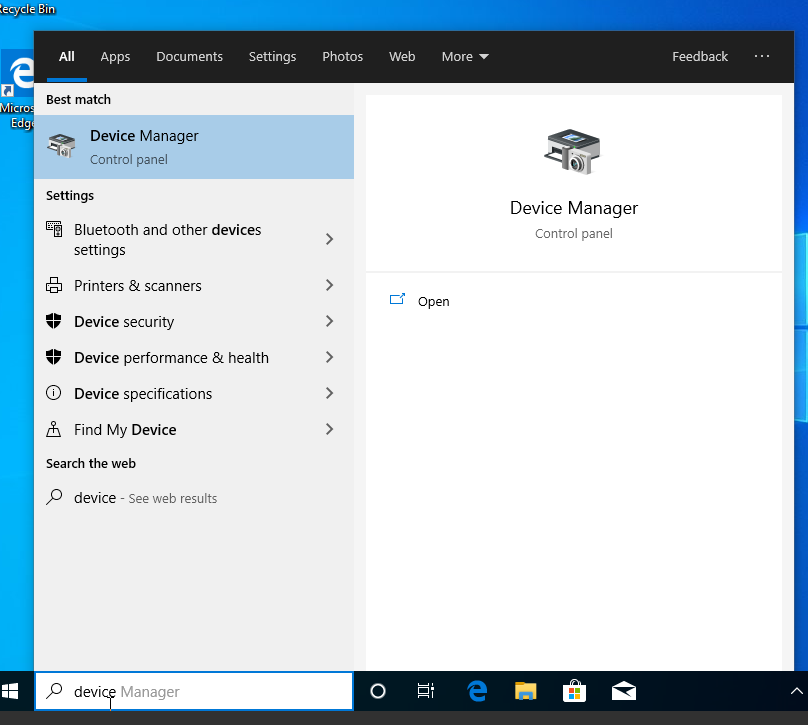
when you finally get the Windows dashboard, open the Device Manager:
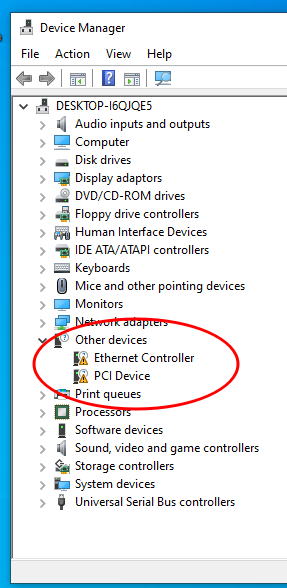
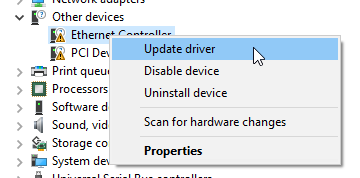
Under “Other devices” you should see devices that need extra driver installation:
Right click on the “Ethernet Controller” and select “Update driver”:
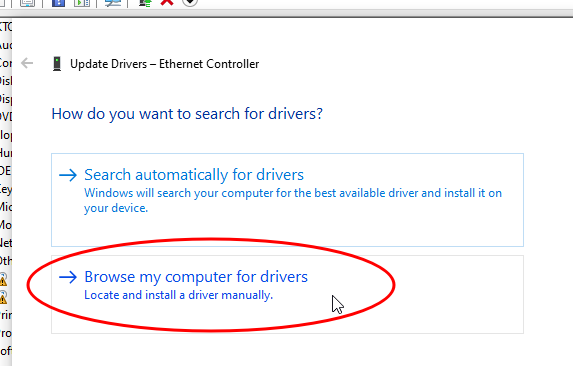
Browse you computer for drivers:
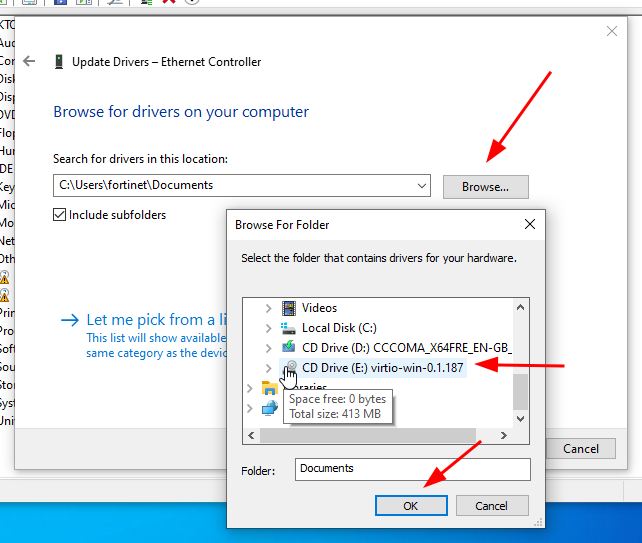
And select the CD Drive with the drivers’ CDRom:
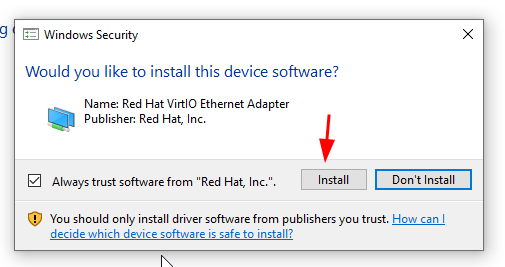
Trust the “Red Hat, Inc” drivers and “Install”:
repeat the operation for the remaining “Other devices”
it is recommended to export the Windows disk at this point to have a blank Windows image with no extra tools (see Exporting the Windows device disk).
you can now install all your extra tools and then export (again) the new Windows disk as explained in Exporting the Windows device disk chapter
Exporting the Windows device disk
Warning
With recent Windows release, Windows is ignoring MAC address update done on network adapter in the PoC. To ensure your Windows always boot with the MAC address defined in the PoC, you must go to the Device Manager and remove the network adapter(s) before shut it down. Since the driver is cached, it should automatically be installed by Windows on next reboot.
Warning
When you (re-)export a disk DON’T reuse the current disk name because the disk is currently used by FortiPoC and the Windows device. If you do you may lose your disk !
GUI
Once the Windows device is shutdown, you can export the created Windows disk directly in the local repository using the device’s “Action” / “Export disk(s) as firmware…” from the dashboard.
The firmware archive is named from the original firmware filename (without extension), you should change the custom version (default: “custom”) used as prefix.
Warning
FortiPoC silently overwrites any firmware with same name.
FortiPoC automatically generates the meta using the original firmware
meta and runs the repo local build command. As FortiPoC clones
the original meta file, there is no constraint on the firmware name
but if you plan to share this firmware, you must also share the meta.
If the device uses multiple disks, they are exported as a Split firmware.
CLI
You can still use the CLI expert commands if you prefer:
to export under
imagesdirectory:fortipoc # expert device disks export 1 1 images/windows-MY_WINDOWS.qcow2
The disk image MUST be prefixed by
windows-to let FortiPoC detects the device type of the image. The first1is the Windows device index and the second1is the Windows device disk index (you can list devices withpoc device listand device’s disk withexpert device disks list <DEVICE_INDEX>command).you can now update your local repository, in CLI:
fortipoc # repo local build
- "images/windows-MY_WINDOWS.qcow2": Update
Complete
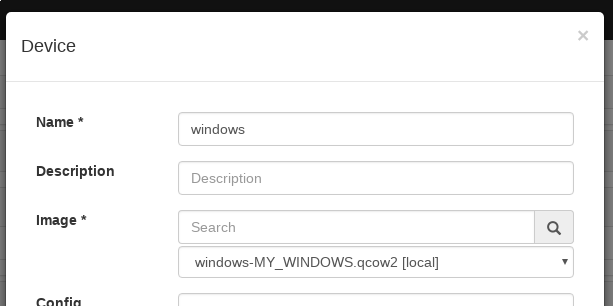
Updating PoC Windows device image
now you must change the Windows device image; replace the installation Windows ISO image by the exported disk:
You can also tick the Start on PoC run option in Advanced Parameters
you can launch the PoC again, it will use your prepared disk
Repeat the Exporting the Windows device disk steps using different disk name if you want to export again the disk after installing or configuring your Windows device.
Dealing with timezone between FortiPoC and Windows VMs
FortiPoC is configured to be in UTC timezone and exposes the system clock to the VMs as UTC too.
But Windows supposes the system clock is in the selected timezone. In this case, even if you change the Windows timezone you still view the clock value exposed by the FortiPoC (except for DST adjustment). In order to get the correct clock, you must tell FortiPoC to expose a timezone clock to the Windows VMs.
In the PoC definition, open the device “Advanced Parameters” and add in “Expert settings”:
{
  "clock": {
    "offset": "timezone",
    "timezone": TIMEZONE
  }
}
TIMEZONE must be replaced by the timezone configured in the
Windows VM (ex: "Europe/Paris").
You should now see your Windows with correct clock.
Exposed CPUs to Windows
Depending your Windows version and license, Windows may refuse to use all CPUs (like Windows 10 Pro before 10.0.19042).
It may also depend of the CPUs topology (sockets/cores/threads).
You can customize things in expert settings, different ways to expose 4 CPUs:
{
"cpu": {
"topology": {
"sockets": "1",
"cores": "4",
"threads": "1"
}
}
}
{
"cpu": {
"topology": {
"sockets": "1",
"cores": "2",
"threads": "2"
}
}
}
{
"cpu": {
"topology": {
"sockets": "2",
"cores": "1",
"threads": "2"
}
}
}
Warning
Windows 10 (and maybe others) only recognized 2 sockets.
Performance in Windows
If you find your Windows performance bad, you can try this expert settings:
{
  "clock": {
    "timer": [
      [
        {
          "name": "rtc"
        },
        {
          "name": "rtc",
          "tickpolicy": "catchup"
        }
      ],
      [
        {
          "name": "pit"
        },
        {
          "name": "pit",
          "tickpolicy": "delay"
        }
      ],
      [
        {
          "name": "hpet"
        },
        {
          "name": "hpet",
          "present": "no"
        }
      ],
      [
        {
          "name": "hypervclock"
        },
        {
          "name": "hypervclock",
          "present": "yes"
        }
      ]
    ]
  },
  "features": {
    "apic": {},
    "hyperv": {
      "relaxed": {
        "state": "on"
      },
      "reset": {
        "state": "on"
      },
      "spinlocks": {
        "retries": "8191",
        "state": "on"
      },
      "stimer": {
        "state": "on"
      },
      "synic": {
        "state": "on"
      },
      "vapic": {
        "state": "on"
      },
      "vpindex": {
        "state": "on"
      }
    },
    "pae": {}
  }
}
You can also try to pin Windows VM vCPU to CPU. It should be better when the CPU are also reserved for this Windows VM only:
{
  "cputune": {
    "vcpupin": [
      [
        {
          "vcpu": "0"
        },
        {
          "cpuset": "4"
        }
      ],
      [
        {
          "vcpu": "1"
        },
        {
          "cpuset": "5"
        }
      ],
      [
        {
          "vcpu": "2"
        },
        {
          "cpuset": "6"
        }
      ],
      [
        {
          "vcpu": "3"
        },
        {
          "cpuset": "7"
        }
      ]
    ]
  }
}
You can also declare IO threads, in this case it’s recommended to not run them on same CPU than those for the vCPU:
{
  "iothreads": {
    "": "2"
  },
  "cputune": {
    "iothreadpin": [
      [
        {
          "iothread": "1"
        },
        {
          "cpuset": "0-3"
        }
      ],
      [
        {
          "iothread": "2"
        },
        {
          "cpuset": "0-3"
        }
      ]
    ]
  }
}